AI Interface Design
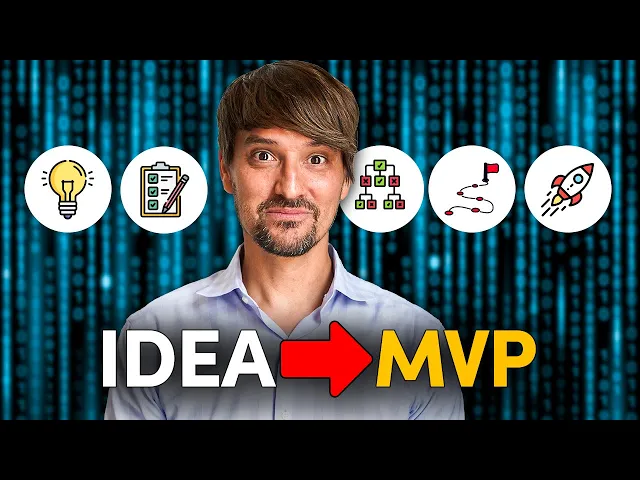
MVP Design Checklist: 10 Steps to Launch Faster
Learn how to efficiently launch your product with a Minimum Viable Product by following this comprehensive 10-step checklist.

Want to launch your product faster? Start with a solid MVP (Minimum Viable Product).
An MVP helps you test your idea with minimal resources, focusing on solving one key problem and gathering user feedback. Follow this 10-step checklist to streamline your process:
Define the Problem and Goals: Use clear problem statements and set measurable goals (e.g., increase DAU by 30% in 3 months).
Prioritize Features: Stick to must-have features using methods like RICE or MoSCoW.
Choose the Right Tools: Use AI design tools (e.g., Figma, Uizard) or Web3 platforms (e.g., Truffle Suite).
Build and Test: Start with low-fidelity prototypes, test user flows, and fix critical issues quickly.
Launch and Iterate: Perform pre-launch checks, track metrics (e.g., retention, crash rates), and update based on feedback.
Quick Comparison: Feature Prioritization Methods
Method | Focus Areas | Best For |
|---|---|---|
MoSCoW | Must-have, Should-have, Could-have, Won’t-have | Simple prioritization |
RICE | Reach, Impact, Confidence, Effort | Data-driven decision-making |
Key takeaway: Solve one user problem, focus on core features, and iterate based on feedback. Start small, move fast, and refine as you go.
How To Plan Your MVP (Minimum Viable Product) in 5 Simple Steps
Step 1: Set Clear Problem and Goals
Defining a clear problem and setting measurable goals is key to your MVP's success. Companies with well-defined objectives are 376% more likely to succeed. Here's how to nail this step.
Map User Problems
Start by crafting a problem statement that answers these questions: Who needs what? For example, "[User group] needs [solution] to address [specific pain point]". This approach ensures all critical details are captured while keeping things straightforward.
To dig deeper into user problems, try these tools:
Tool Type | Example Tools |
|---|---|
NLP Analysis | IBM Watson, Google NLP API |
Sentiment Analysis | |
Real-time Feedback | Interactive chatbots |
Define Key Performance Metrics
Your MVP's success depends on clear, measurable goals. Use the HEART framework (Happiness, Engagement, Adoption, Retention, Task Success) and, for Web3 projects, consider metrics like Token Adoption Rate and Total Value Locked (TVL). For SaaS MVPs, focus on metrics like Monthly Recurring Revenue (MRR) and Customer Acquisition Cost (CAC).
Make sure your goals follow the SMART criteria. For example, instead of saying "increase user engagement", aim for something like "achieve a 30% increase in daily active users (DAU) within 3 months".
To stay on track, set up shared dashboards for regular progress reviews. This keeps everyone aligned and ensures your MVP evolves in the right direction.
These defined goals will guide your feature prioritization in the next step.
Step 2: Select Must-Have Features
Once your goals are clear, it’s time to prioritize the features that directly support your main idea.
Prioritizing Features with Proven Methods
Frameworks like MoSCoW and RICE can help you organize and rank features effectively. Here’s a quick comparison of how they work:
Framework | Components | Best For |
|---|---|---|
MoSCoW | Must-have, Should-have, Could-have, Won’t-have | Quick and straightforward prioritization |
RICE | Reach, Impact, Confidence, Effort | Making decisions based on data |
A great example? When Airbnb launched its MVP in 2008, it included just the essentials: listings, photos, and payments. This lean approach led to 80 convention bookings within two months.
Keep User Needs Front and Center
When choosing features, always tie them back to user needs. Here’s how:
Start with User Journey Mapping
Use tools like Figma to create detailed user flows. Focus on solving the biggest pain points first. For instance,
Slack’s 2013 MVP centered solely on team messaging, which saved six months of development time.
Stick to the One-Core-Problem Rule
Prioritize features that address your primary user problem. Twitter’s early success came from focusing only on 140-character messages, showing that simplicity can win users over.
Use Feature Scoring to Stay Objective
A simplified RICE scoring system can help you decide. Here’s how it works:
Metric | Scale |
|---|---|
Reach | 1–10 |
Impact | 1–3 |
Confidence | 50–100% |
Effort | 1–5 months |
Score each feature based on Reach (how many users it affects), Impact (its importance on a 1–3 scale), Confidence (how sure you are, in percentage), and Effort (how long it will take).
Step 3: Pick Design Tools
Once you've prioritized features, it's time to implement them using tools that simplify prototyping and help you make faster decisions. Focus on platforms that align with your MVP's core functionality.
AI Design Software Options
AI-powered design tools can cut design time by up to 30-50% with features like automated layouts and smart suggestions.
Look for AI tools that can:
Create responsive layouts (e.g., Figma Auto Layout)
Offer design component suggestions (e.g., Uizard)
Develop brand assets (e.g., Adobe Firefly)
Tool | Key Features | Best For |
|---|---|---|
Adobe Firefly | AI-generated images, Content-Aware Layout | Building brand assets |
Uizard | Rapid prototyping, Template generation | Quick wireframing |
Automated brand identity creation | Logos and visual identity |
Web3 Development Tools
If your MVP involves blockchain functionality, these tools can be essential:
Feature | Purpose | Example Tool |
|---|---|---|
Matches Prioritized Features | Ensures alignment with Step 2 goals | Truffle Suite |
Smart Contract Testing | Verifies security and reliability | Truffle Suite |
Multi-chain Support | Reaches broader markets |
These tools lay the groundwork for the rapid prototyping process covered in Step 4.
Step 4: Create and Test MVP
Once you've chosen your design tools, it's time to build your prototype and test it with users. The goal here is to develop quickly and collect feedback that helps you refine your product.
Prototyping Approaches
Start with simple, low-fidelity prototypes to test your main ideas without spending too much time on details. These can be as basic as paper sketches or created with digital tools to outline user flows.
Prototyping Level | Tool Example | Best For |
|---|---|---|
Low-fidelity | Mapping basic user flows | |
Mid-fidelity | Figma | Creating interactive wireframes |
High-fidelity | Building a functional MVP |
If your product involves complex features, consider using augmented reality (AR) previews to test interactions. IKEA's Place app is a great example - it allows users to see how furniture would look in their homes before buying.
How to Test Your MVP
Design your user tests to answer specific questions about your product's core value. You can leverage the AI or web3 tools mentioned in Step 3 to streamline these tests.
Testing Phase | Focus Areas | Tools |
|---|---|---|
Initial Testing | Task completion, Time on task | UserTesting |
Behavior Analysis | User flow, Drop-off points | |
Feature Validation | Adoption rate, User satisfaction |
For instance, Audius, a music NFT platform, tested its MVP on Ethereum testnets before launching on the mainnet. They validated their streaming functionality with 500 early creators, ensuring key features worked as intended.
To maximize testing results:
Define scenarios for key user journeys, including edge cases.
Use a diverse group of testers to measure task completion rates.
Address critical issues and implement fixes within 48 hours.
This testing phase will provide the insights you need for the pre-launch checklist in Step 5.
Step 5: Release and Update
Pre-Launch Checks
Before launching your MVP, it's essential to go through a detailed checklist to confirm everything is ready. For web3 and AI applications, pay extra attention to security and performance.
Check Category | Key Actions |
|---|---|
Security | Conduct smart contract audits, Test authentication systems |
Performance | Perform load testing, Verify API functionality |
Compliance | Ensure data privacy standards are met, Check legal requirements |
Analytics | Set up tracking tools, Enable event logging |
Key Tasks to Complete Before Launch:
Double-check the security of all smart contracts.
Test user authentication on every platform.
Make sure analytics tools are tracking the right metrics.
Confirm that API integrations and cross-platform features work seamlessly.
These steps help maintain quality while keeping your MVP flexible for future updates.
Post-Launch Updates
Once your MVP is live, use the feedback tools you built into its design to guide updates. This approach aligns with the Build Feedback Loops principle.
Focus on improvements methodically, balancing easy fixes with more strategic changes. Feature flags can help you roll out updates in phases, reducing risks.
Track these key metrics using the tools you set up in Step 3:
User acquisition and retention rates
System performance (e.g., load times, uptime)
Error and crash reports
Adoption rates for new features
This data will guide your decisions and keep your MVP moving in the right direction.
Conclusion: MVP Launch Steps Review
Following Steps 1-5 ensures a solid foundation for launching products effectively. This approach helps teams move faster without sacrificing quality.
The strength of this checklist lies in its focus on key priorities and step-by-step development.
Key Principles for Success:
Solve a single, critical problem (Problem-Solution Fit)
Use advanced tools to deliver core features
Establish consistent feedback mechanisms
These principles emphasize:
Prioritizing one main problem and solving it thoroughly
Using resources like AI design tools or Web3 platforms to enhance functionality
Building ongoing feedback loops for improvement
Conducting thorough pre-launch checks
Planning structured updates after launch
A great example is Spotify's invite-only MVP, which allowed for controlled growth and refinement. This strategy helped them secure 1 million paying users within their first year.
This checklist acts as a roadmap to achieve product-market fit efficiently, balancing user expectations with technical execution.